What is hostscan?
Hostscan is a feature of Cisco AnyConnect. When a host attempts to VPN into a network, hostscan verifies specific settings are in place. A common example is ensuring Antivirus (AV) is installed. Other examples include looking for specific registry keys, checking for a firewall, etc.
From an attackers stand point, this can be a huge pain. What if I want to VPN in with my Linux box but the environment mandates AV? Or worse.. What if they are not publishing the Linux binaries at all? Let’s dig into hostscan a bit more and try to find a way around this.
How does hostscan work?
Hostscan works by downloading a few binaries (cscan, cnotify and cstub) from the AnyConnect server and executing them locally (!!!). If you think about it, this alone is alarming. All it would take is an attacker compromising the ASA and replacing the hostscan binaries with rogue ones and each user that connects to VPN would be infected. But I digress.
When hostscan is done scanning the host, it does a POST to https://<VPN HOST>/+CSCOE+/sdesktop/scan.xml?reusebrowser=1 with the scan results. As long as you POST the correct settings, you will be authorized to connect to the network. This is where hostscan-bypass comes into play.
Hostscan Bypass
Hostscan-bypass is a hacked version of tcpprox. After playing around with AnyConnect for a while, I was able to figure out how to reliably enumerate the network settings required to connect to a given network.
So, all you have to do is run the script hostscan-bypass.go on your attacking machine and try to connect to it from the AnyConnect client. You’ll essentially setup a Man in the Middle (MITM) attack on yourself in order to get the correct network settings.

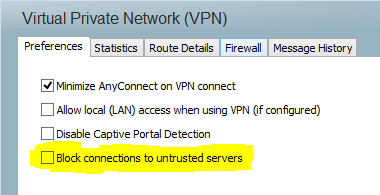
Now with the listener in place, we will initiate a connection from the AnyConnect client on the Windows host that we want to spoof. Before trying to connect, be sure to uncheck the “Block connections to unstrusted servers” box in AnyConnect’s preferences. Our attacking machine is using a self signed cert. If this box is checked, AnyConnect will refuse to connect.

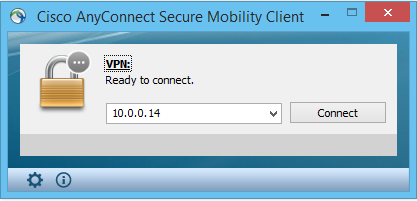
Now initiate the connection to your attacking box. In this case, my IP address was 10.0.0.14.
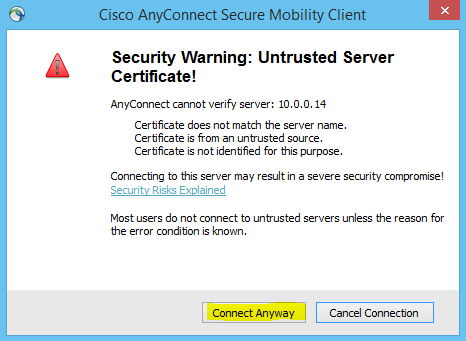
After hitting connect, you will see a prompt like this one. Click “Connect Anyway”.
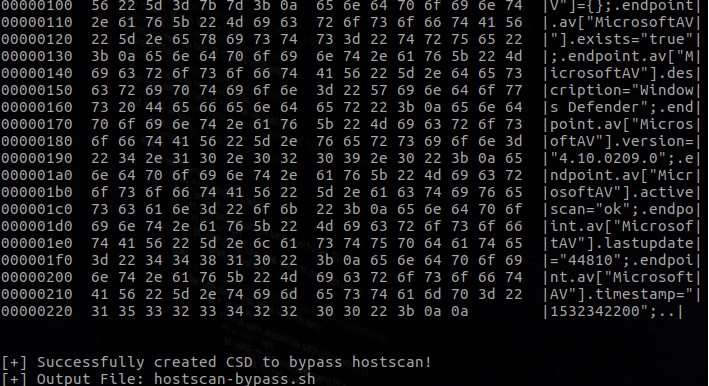
On your attacking machine, you should be seeing a bunch of activity. Now all you do is wait. You don’t need to authenticate in order for the hostscan to take place. Once the endpoint information is sent across the wire, hostscan-bypass has enough information to generate the CSD file.

You need to make hostscan-bypass.sh executable before OpenConnect can use it. Now that you have the CSD file, you can simply connect using OpenConnect:
sudo chmod +x hostscan-bypass.sh
sudo openconnect --csd-wrapper=hostscan-bypass.sh <VPN URL> --os=win
No access to the target machine
If you have no access to the target machine, you are in unchartered waters. I discovered that AnyConnect actually publishes the requirements to connect to the target VPN, but it will require a lot of trial and error. Since you don’t have the exact endpoint arguments, you will be trying to guess them.
Take a look at the following URL- it will give you a starting point.
https://<VPN URL>/CACHE/sdesktop/data.xml
Troubleshooting Connection Loops
If you never get to the login prompt and find yourself looping on GET https://<VPN URL>/+CSCOE+/sdesktop/wait.html it is likely because the CSD file is not executable. You need to run the command below in order for OpenConnect to successfully utilize the CSD file.
sudo chmod +x hostscan-bypass.sh

